#2 · Add a README to your GitHub profile
Add more substance to your GitHub profile with just a few steps
Dear reader,
I was today years old when I discovered that you can add a full README to your GitHub profile. I’m not referring to a README on a GitHub repository, I’m referring to a README on your GitHub profile.
It’s easy to add this README. Here are the details.
First step: create a new repository
GitHub will use the README of the repository that has the same name as your GitHub profile. My GitHub profile is simardcasanova so I needed to create a repository also named simardcasanova.
 simardcasanova
When you create the new repository, be aware of the three following settings.
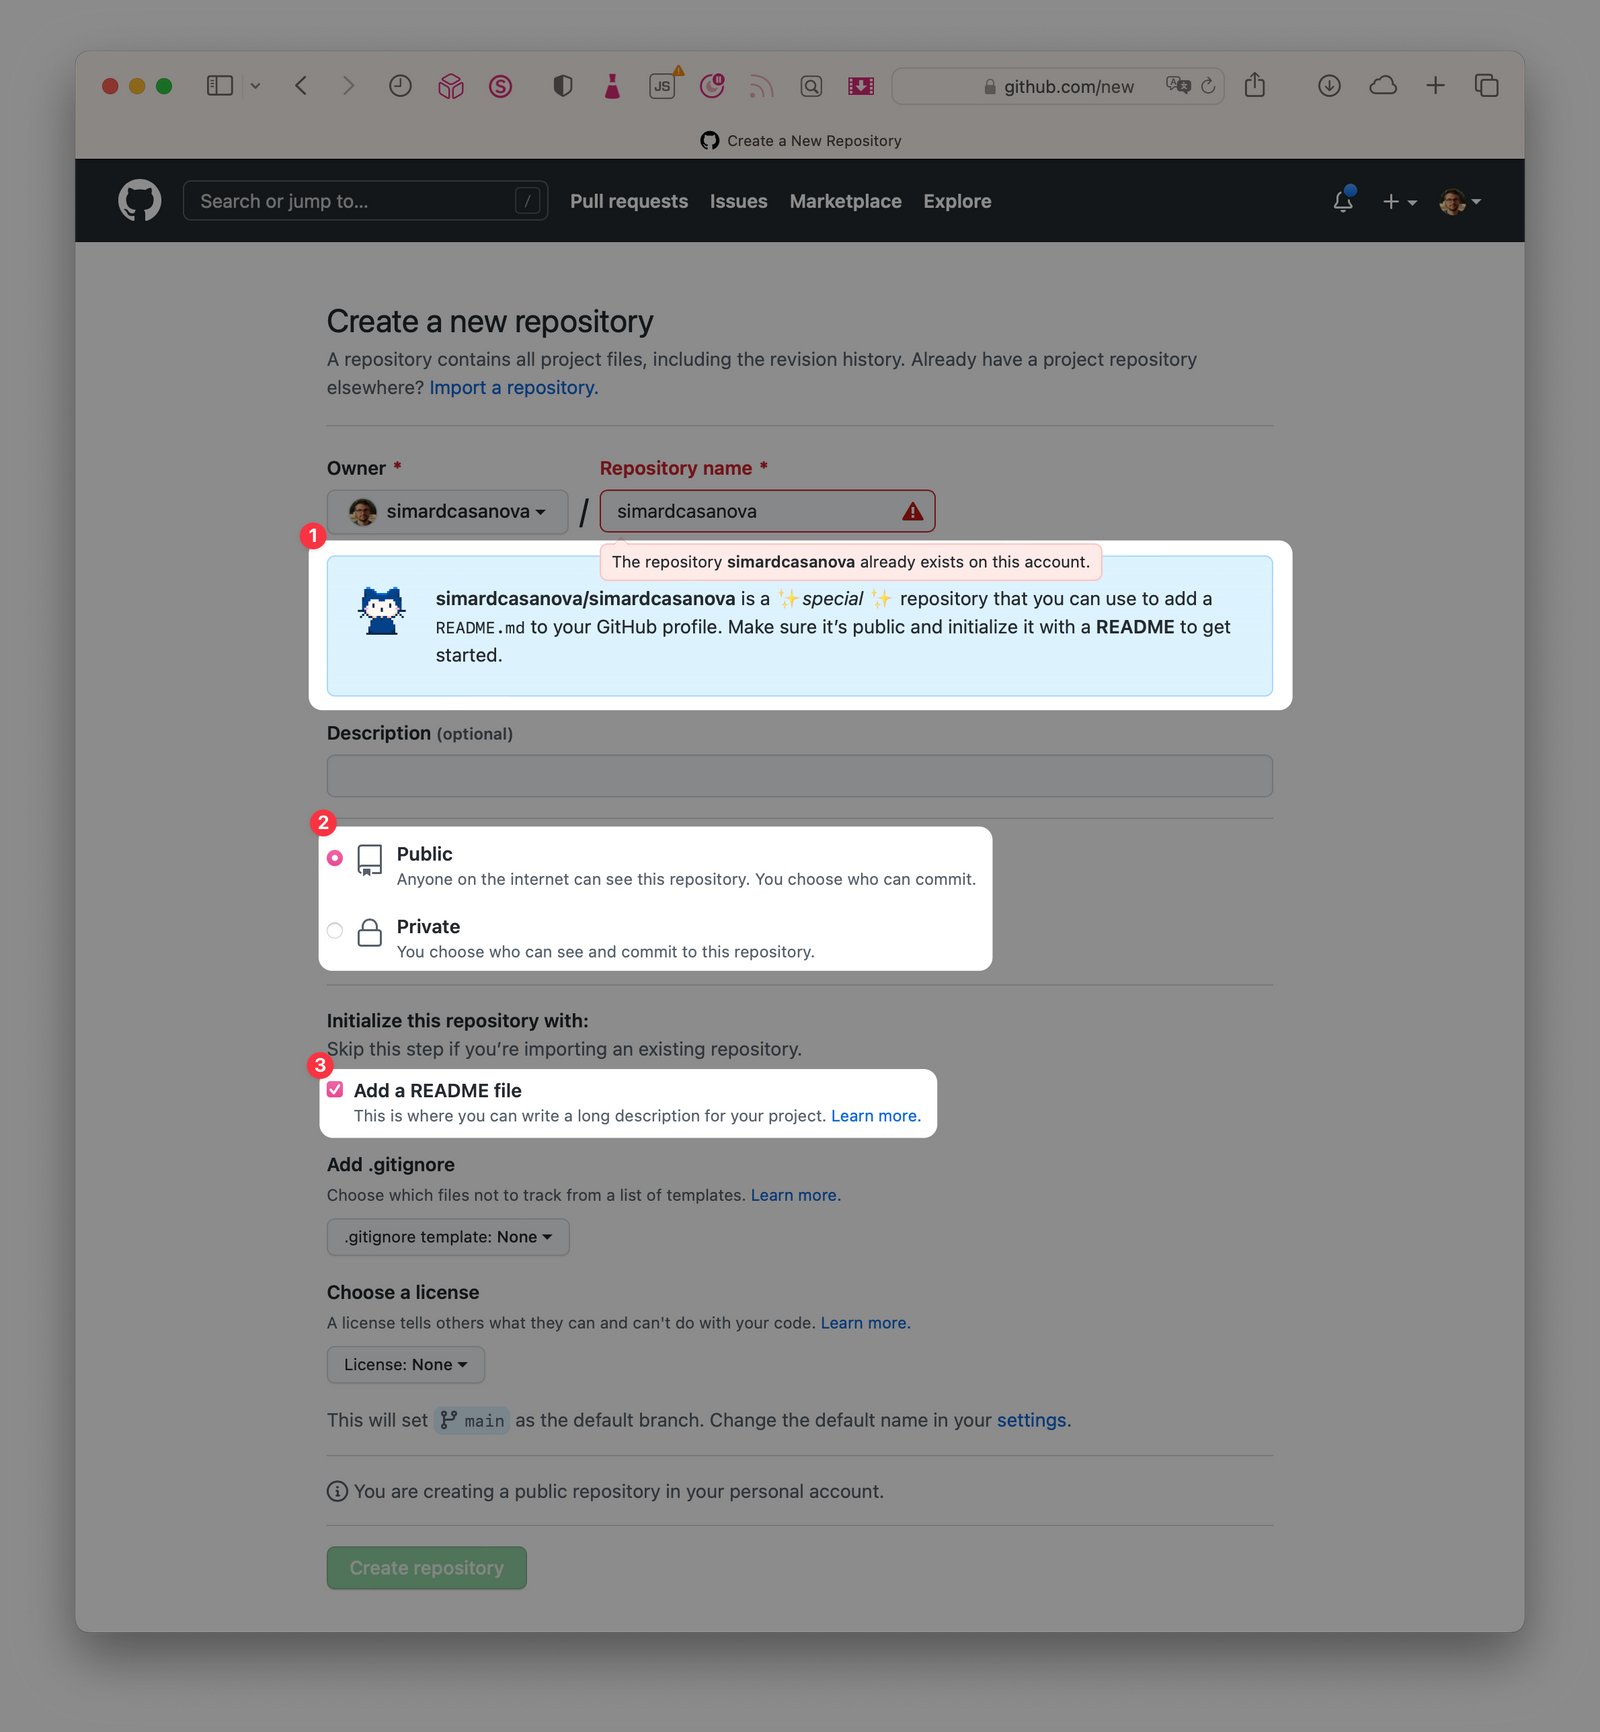
- GitHub tells you that you’re about to create a special repository. The blue alert is a confirmation that you gave the right name to your repository.
- To make the README appears in your profile, you need to make the repository public. It’s possible to make it private as well, for instance if you want to first design your README behind closed doors.
- Don’t forget to check the box to add a README file. You can still create one later but it’s easier if the file is already created.
Once everything is in order, you can proceed and create the repository.
Second step: edit the README file
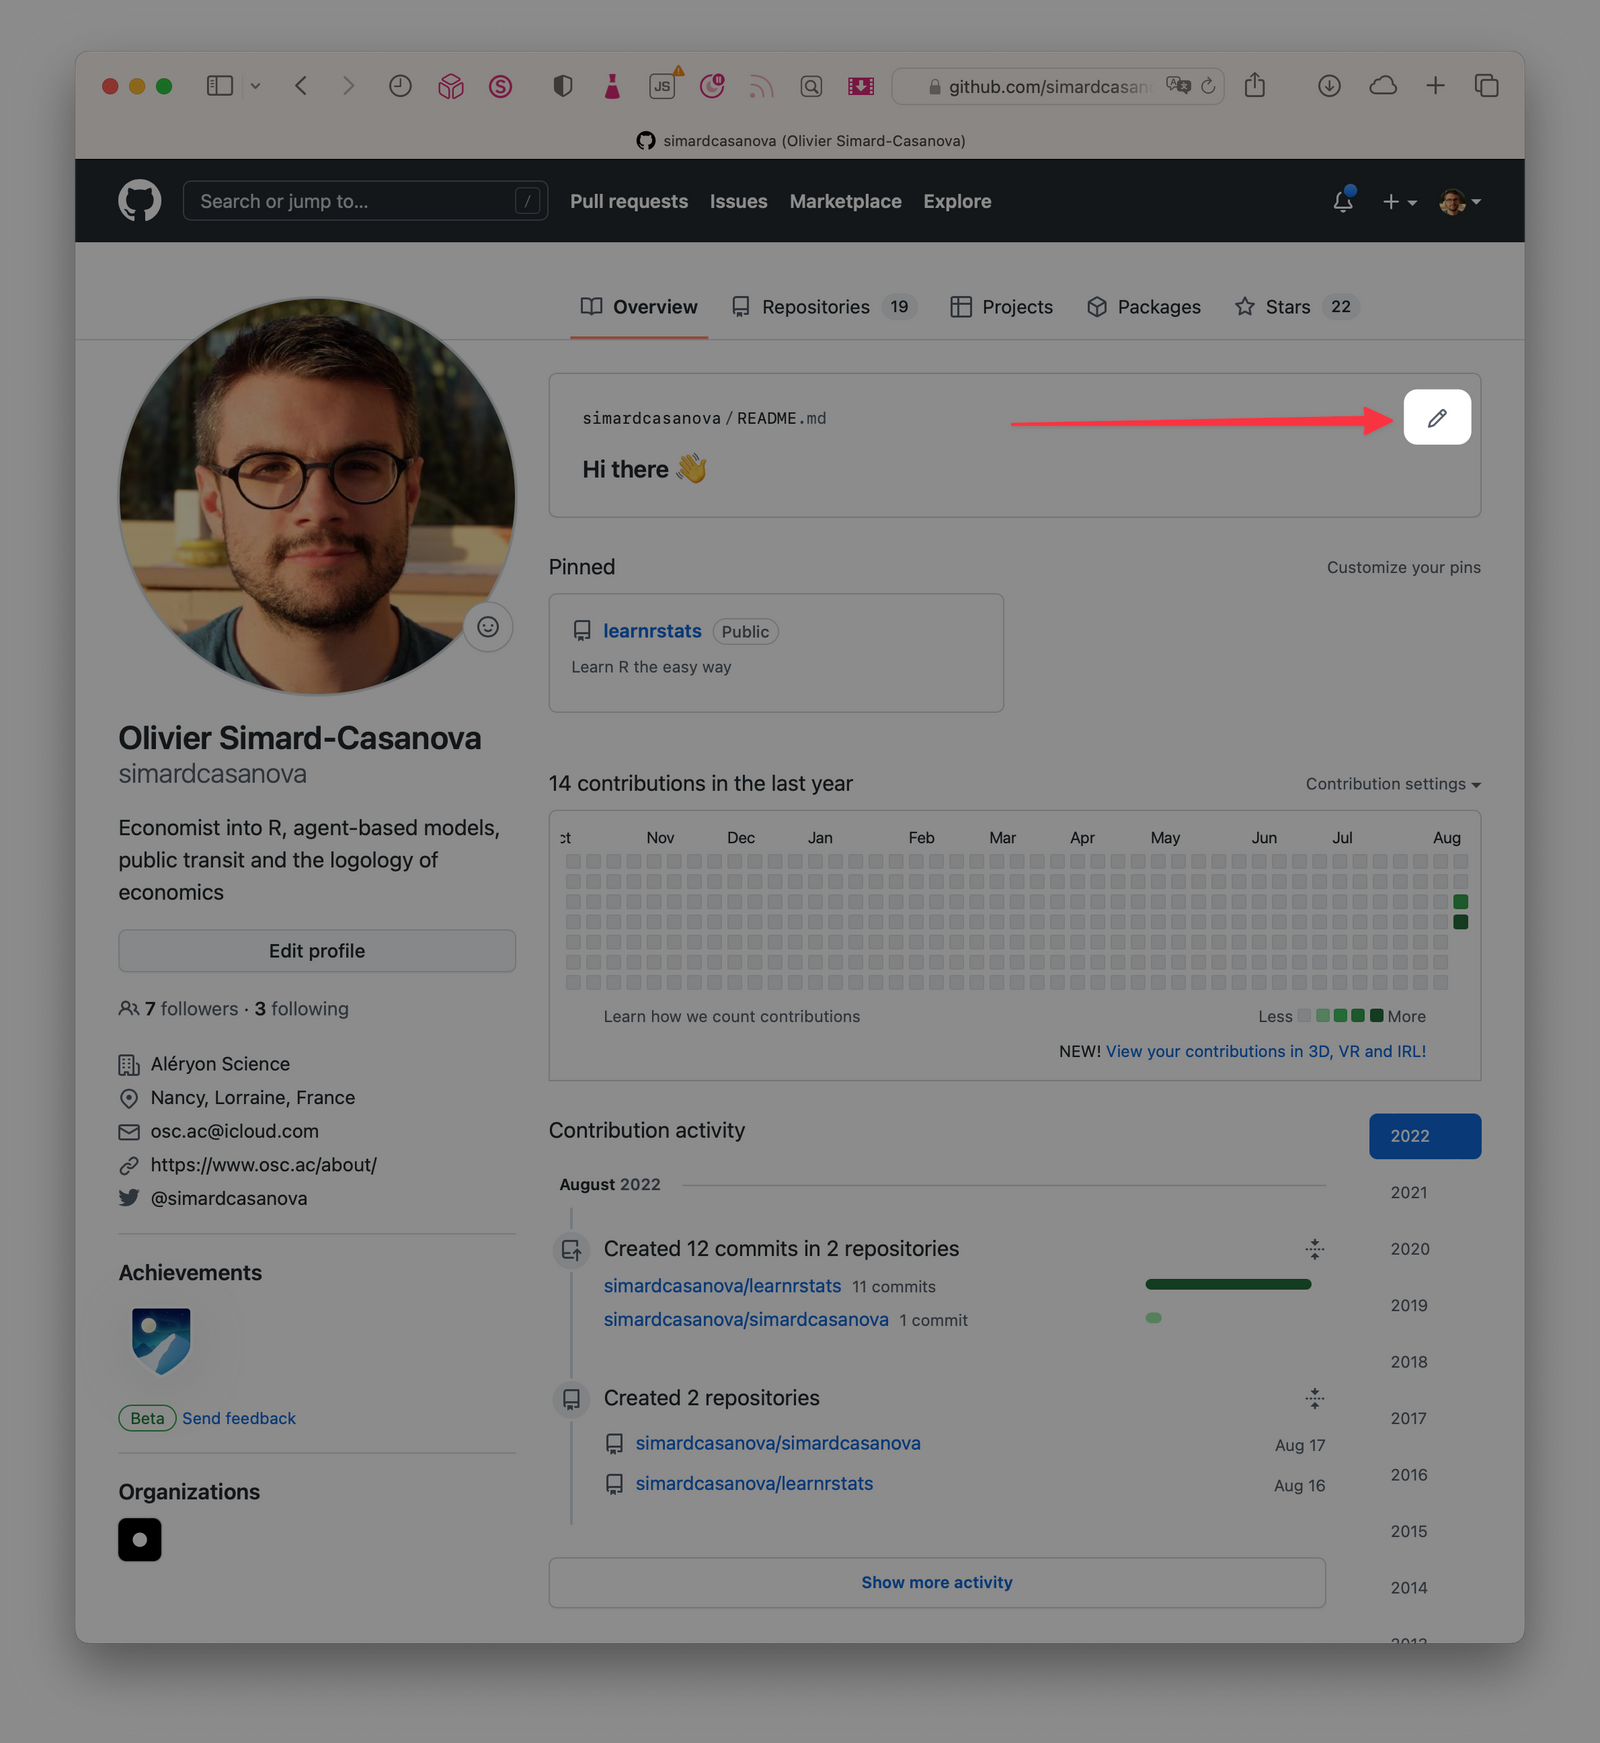
Navigate to your new repository. The blue alert (1) confirms it’s indeed a special repository.
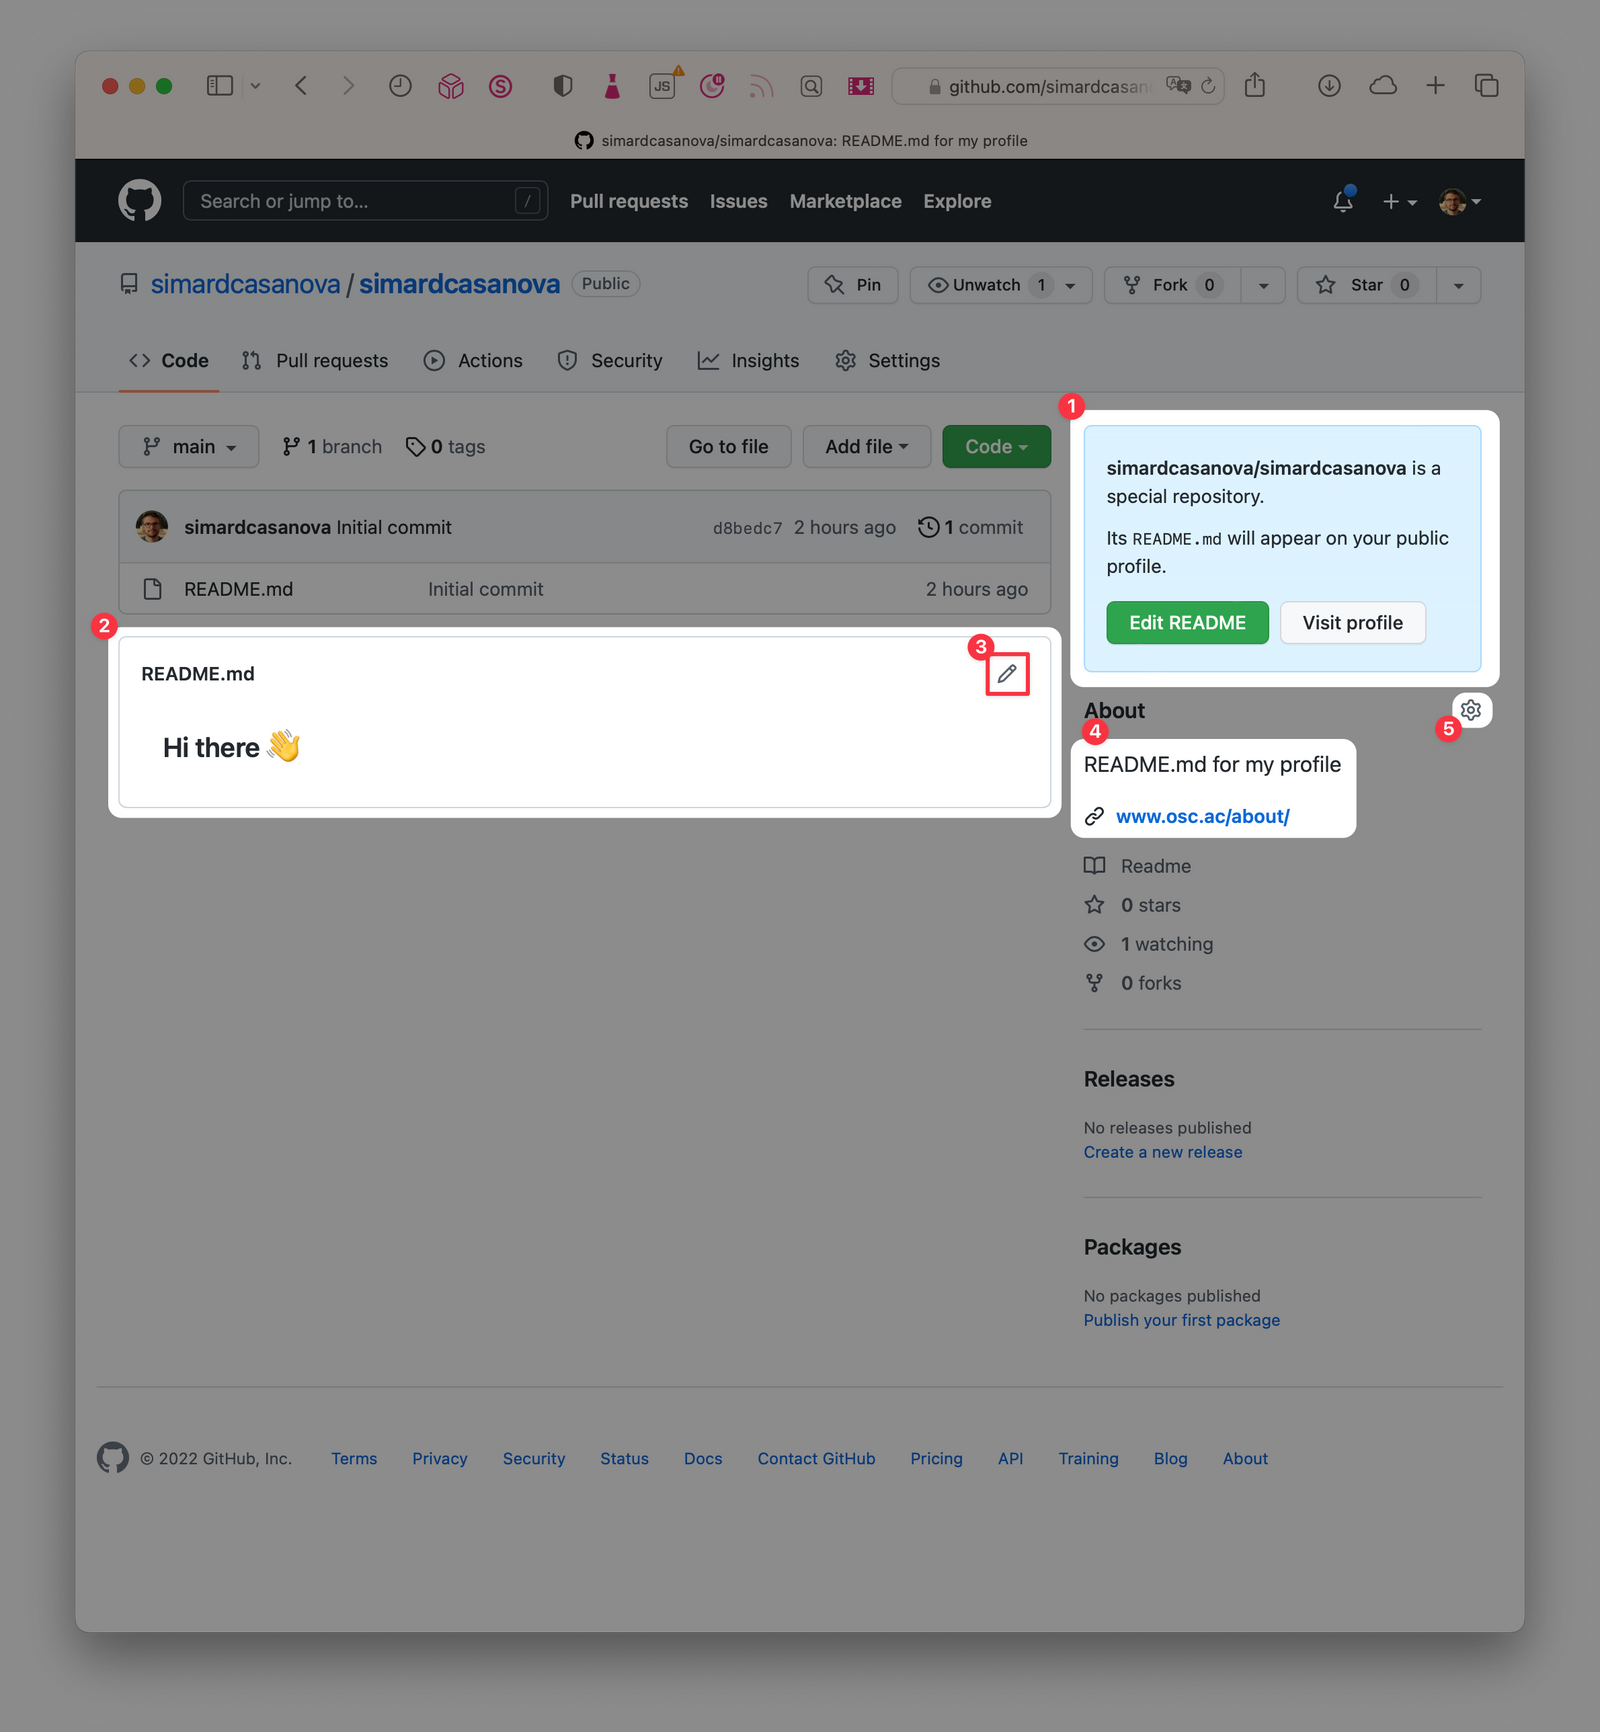
To make the repository a bit more professional, you can add some metadata (4). To do so, click the cog icon (5) and adjust the details.
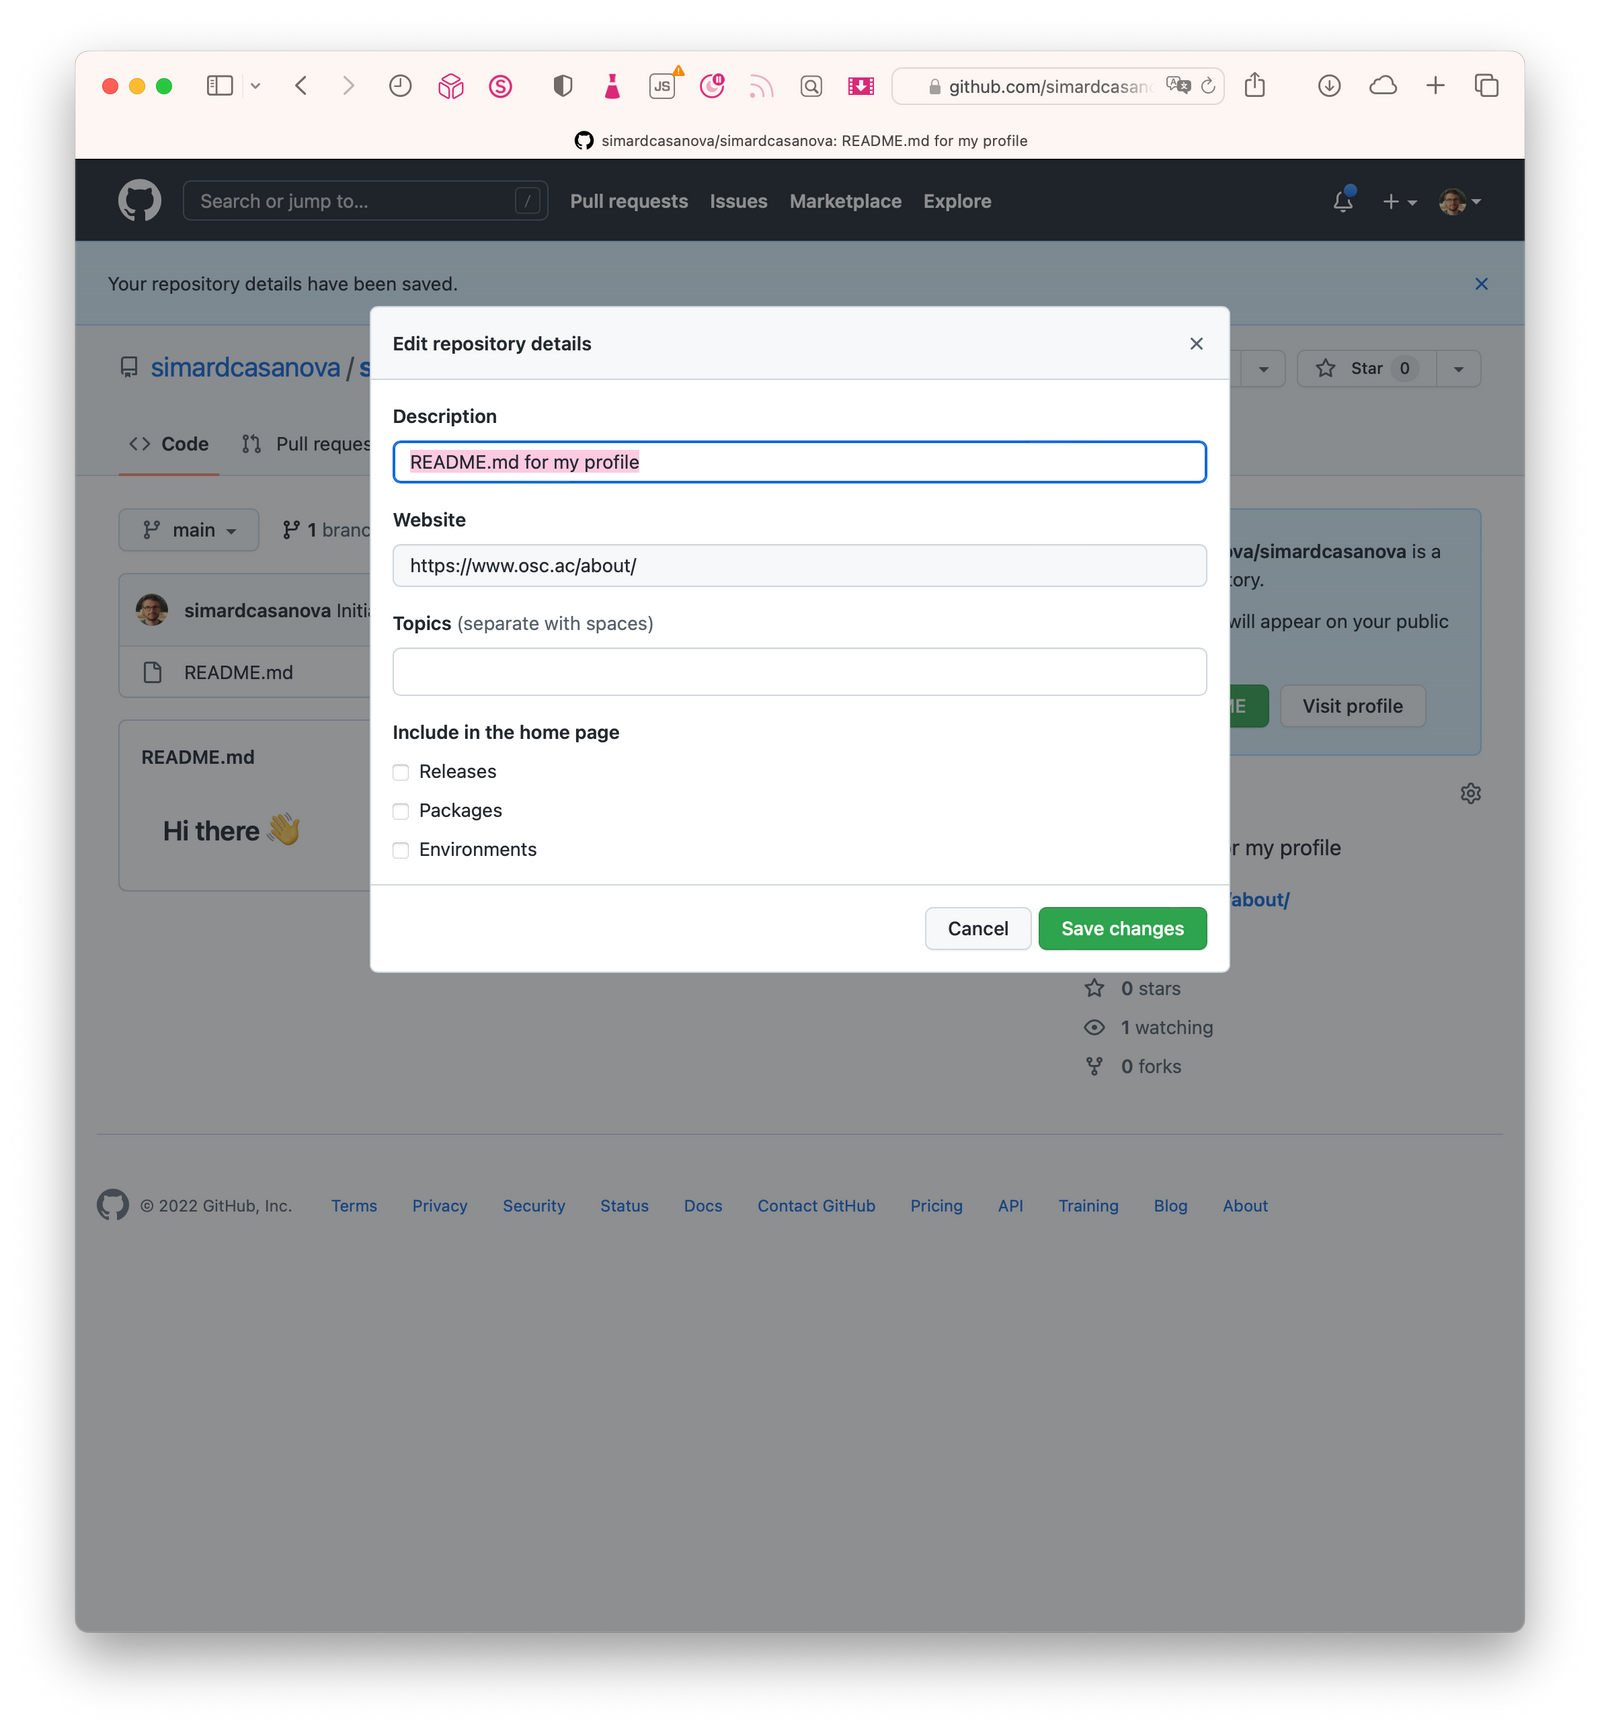
I haven’t dive into this yet, but I guess Topics could be an interesting way to enhance the discoverability of your profile in your area of expertise.
Now you probably want to edit the README itself. As shown in Figure 3, you can either click on the “Edit README” button (1) or on the pen icon (3). GitHub opens an editor.
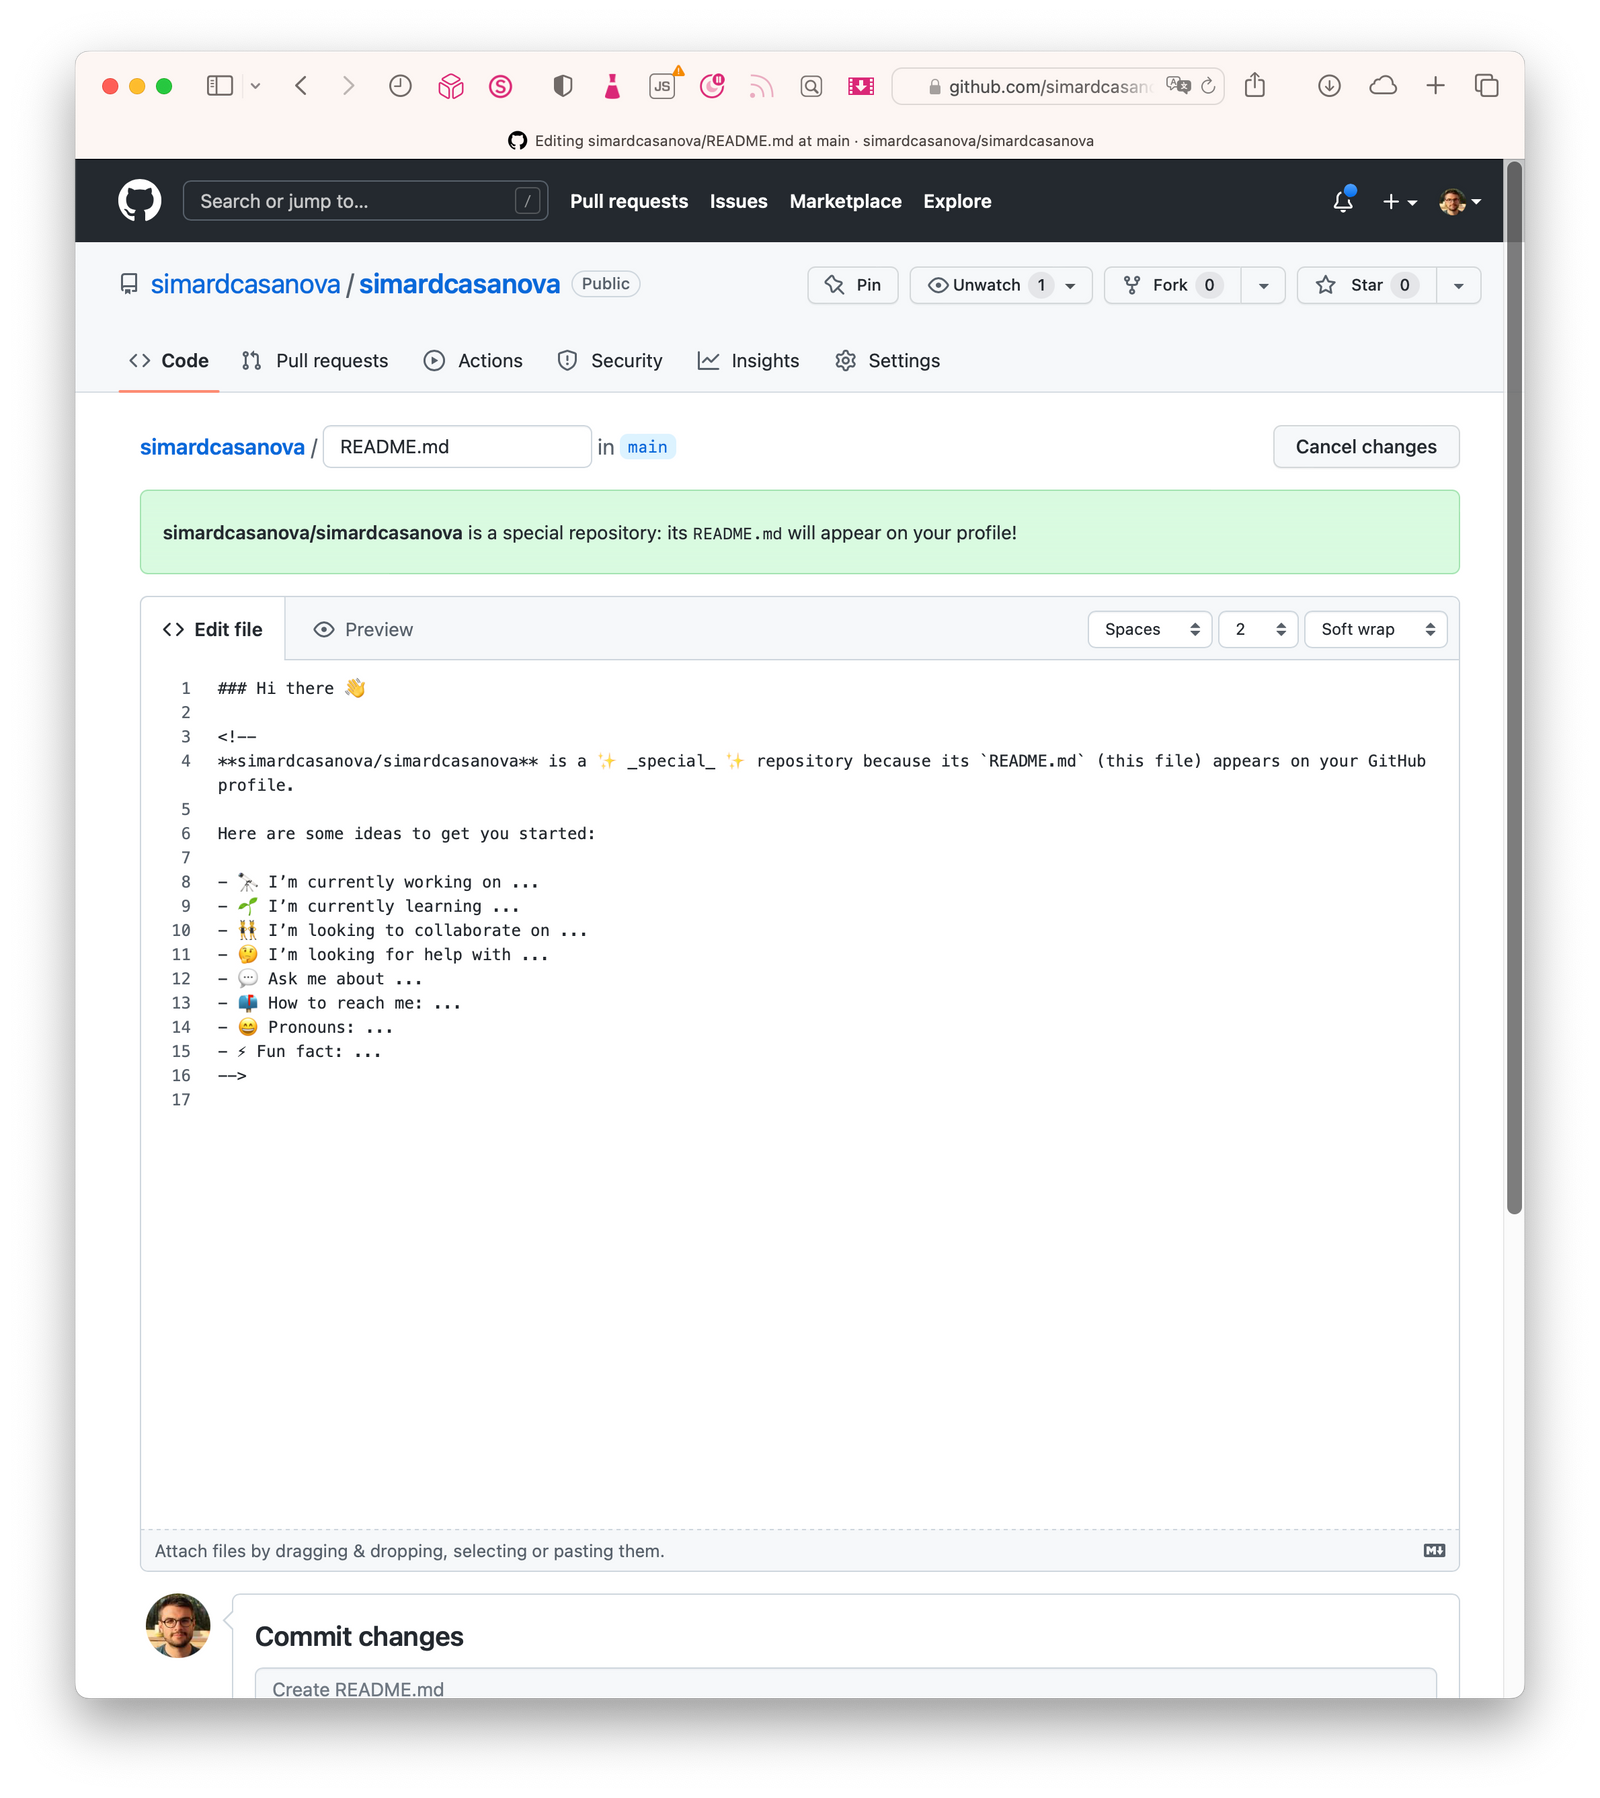
You need to use Markdown to style your README. If you’re not familiar with Markdown, here is a help page on GitHub Docs.

Last but not least, you can edit the README file directly from your profile.
Every time you want to update your profile, you just need to edit the README file. That’s it!
Third step: write a good README
As I just discovered this feature, I haven’t had enough time (yet) to see how people use it and what a good profile README looks like.
What’s sure though is that you can leverage the full set of features available in GitHub README files. You can display images and buttons — and probably many other things.
Extra step: choose which repositories to display in your profile
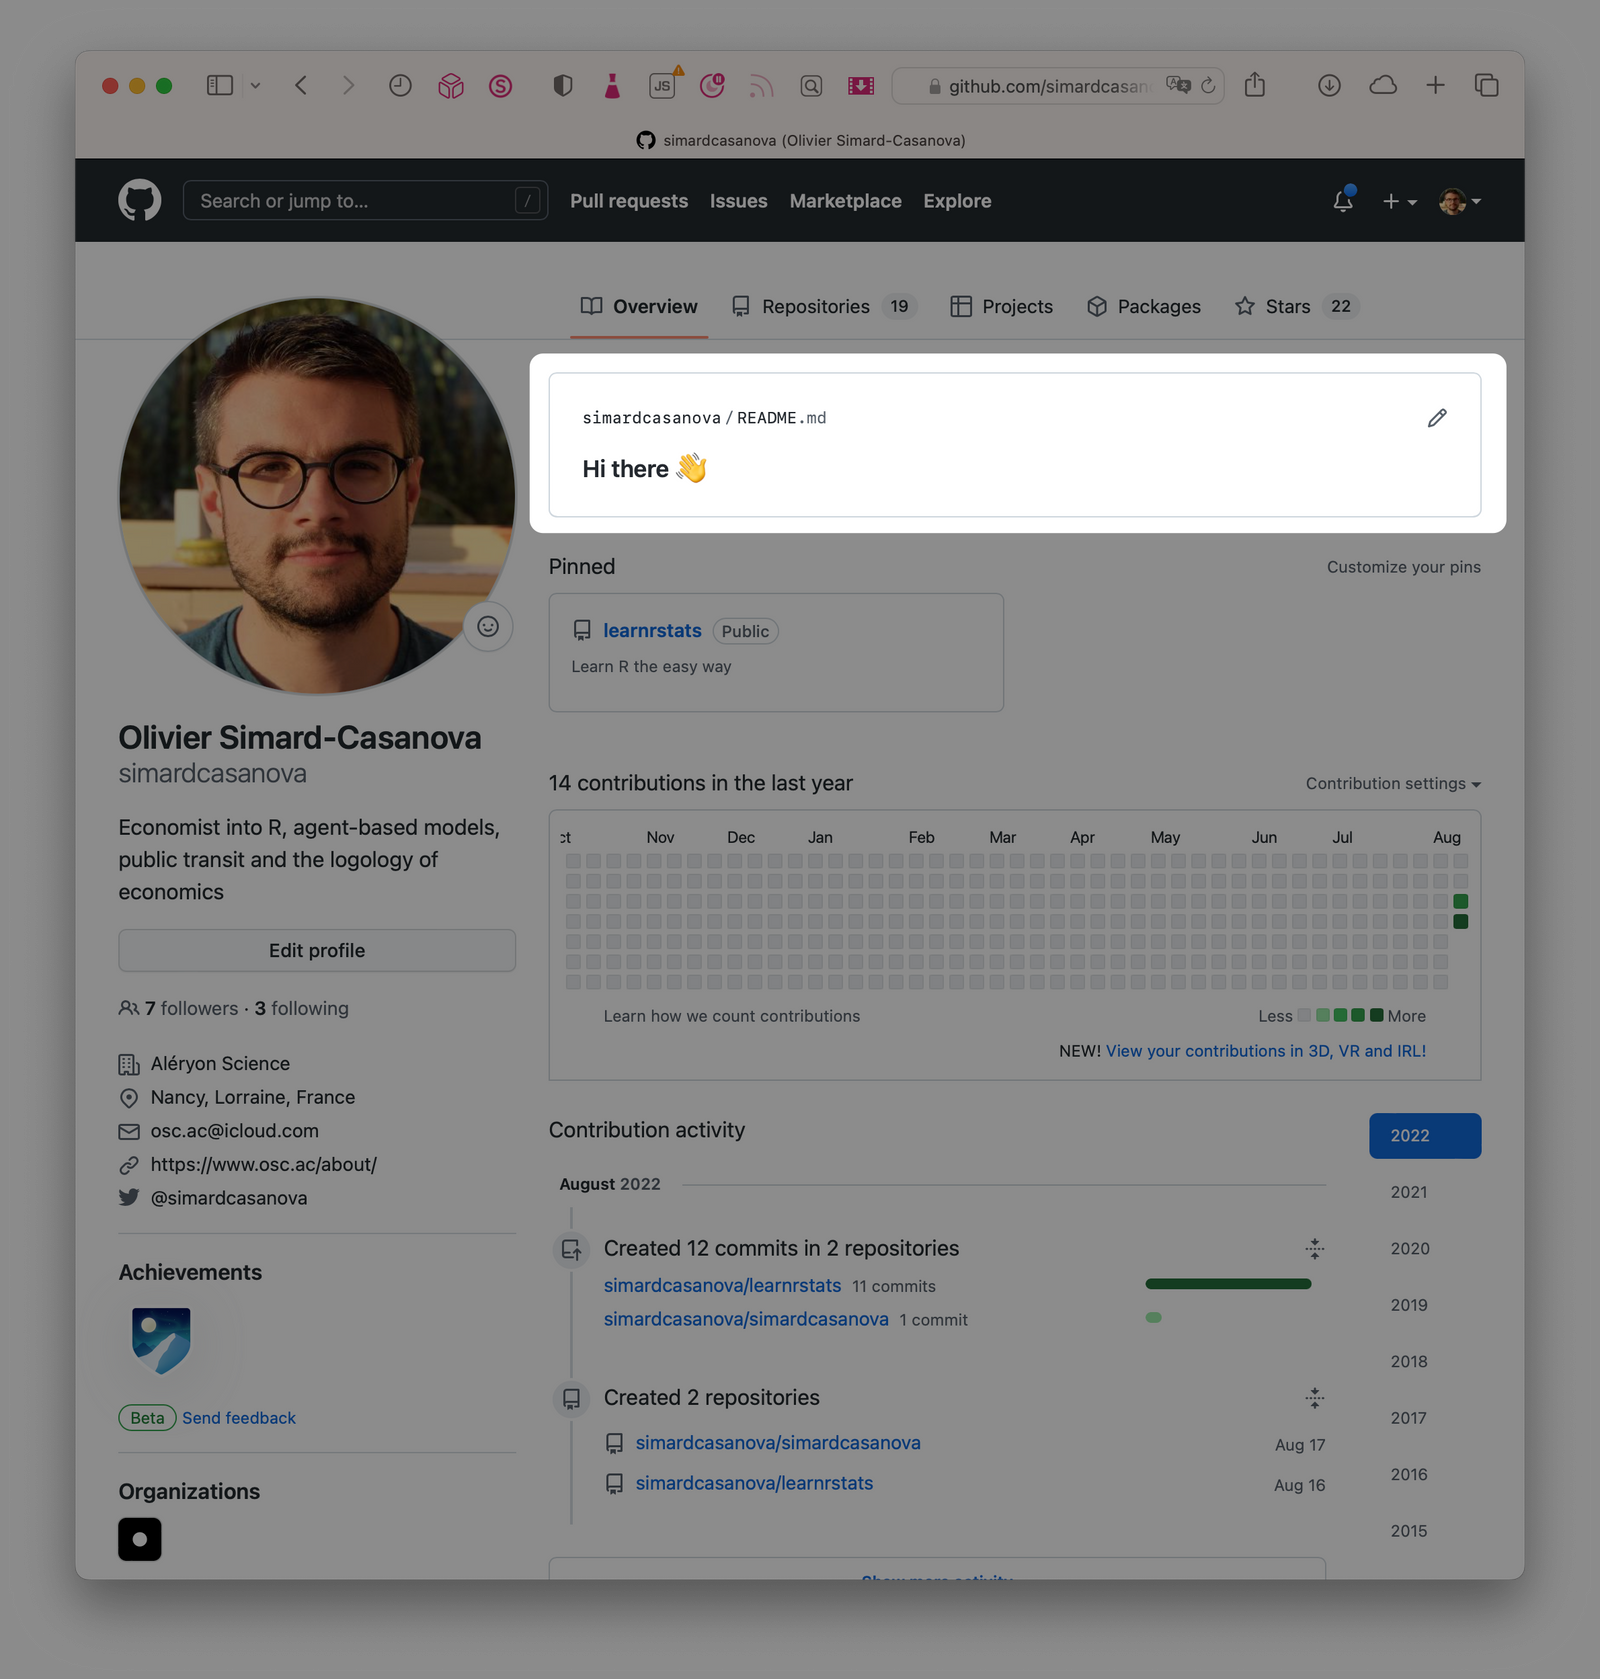
Thanks to pinned repositories (1), you can also choose which repositories people will see on your profile. It’s useful if you want to showcase a few specific repositories, for instance your most popular ones or the new cool thing you’re working on — such as LearnRstats 👀

Every time you want to update your profile, you just need to edit the README file. That’s it!
Third step: write a good README
As I just discovered this feature, I haven’t had enough time (yet) to see how people use it and what a good profile README looks like.
What’s sure though is that you can leverage the full set of features available in GitHub README files. You can display images and buttons — and probably many other things.
Extra step: choose which repositories to display in your profile
Thanks to pinned repositories (1), you can also choose which repositories people will see on your profile. It’s useful if you want to showcase a few specific repositories, for instance your most popular ones or the new cool thing you’re working on — such as LearnRstats 👀
Olivier